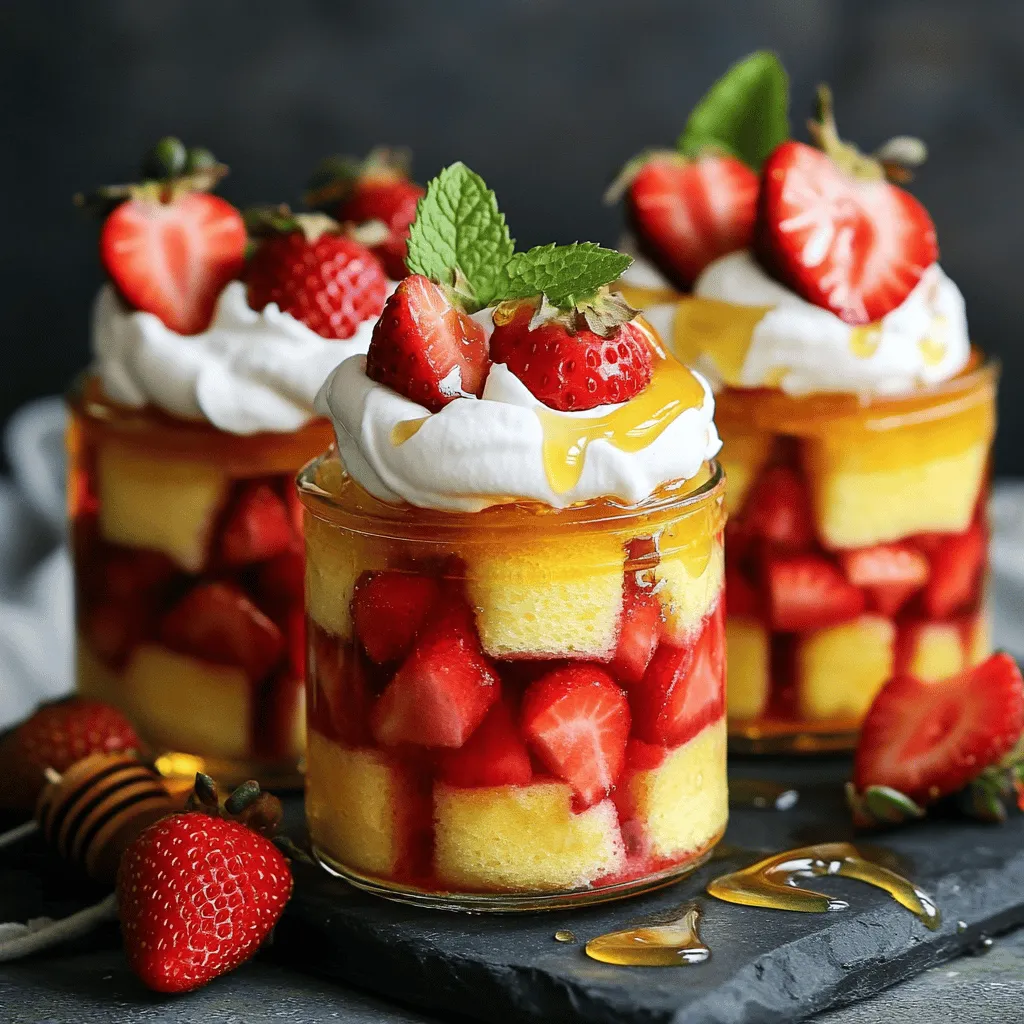
Looking for a fun treat that’s easy to make? Strawberry Shortcake Cake Jars are perfect for you! I’ll guide you through simple steps to create these tasty desserts. These jars are not only delicious but also a great way to impress your friends at gatherings. Let’s dive into the ingredients and tools you need to whip up this lovely dessert that’s sure to delight everyone!
Ingredients
Main Ingredients for Strawberry Shortcake Cake Jars
To create your Strawberry Shortcake Cake Jars, gather these main ingredients:
– 2 cups fresh strawberries, hulled and sliced
– 1/4 cup granulated sugar (for strawberries)
– 1 teaspoon vanilla extract
– 2 cups whipped cream (store-bought or homemade)
– 1 cup all-purpose flour
– 1/2 cup granulated sugar (for cake)
– 1 1/2 teaspoons baking powder
– 1/2 teaspoon baking soda
– 1/4 teaspoon salt
– 1/2 cup unsalted butter, melted
– 2 large eggs
– 1/2 cup milk
These ingredients create a sweet and creamy treat. The strawberries provide freshness, while the whipped cream adds lightness.
Recommended Tools and Equipment
For this recipe, you will need a few tools:
– Mixing bowls
– Whisk
– Measuring cups and spoons
– Baking dish (8×8-inch)
– Toothpick (for checking cake doneness)
– Jars or cups for serving
Having the right tools helps you work faster and more easily.
Optional Garnishes
Garnishes add beauty and flavor. Consider these options:
– Honey drizzle
– Fresh mint leaves
– Extra strawberry slices
These touches make your jars look fancy and taste amazing.Enjoy your delicious creation!
Step-by-Step Instructions
Preparing the Strawberries
To start, you need fresh strawberries. First, hull and slice them. In a medium bowl, mix the sliced strawberries and 1/4 cup of granulated sugar. Gently toss them to coat. Cover the bowl and let it sit for about 30 minutes. This helps the strawberries release their sweet juice. The juice will soak into the cake later, making it even better.
Baking the Cake
Next, it’s time to bake the cake. Preheat your oven to 350°F (175°C). In a separate bowl, whisk together 1 cup of flour, 1/2 cup of sugar, baking powder, baking soda, and salt. In another bowl, mix 1/2 cup of melted butter, 2 eggs, 1/2 cup of milk, and 1 teaspoon of vanilla. Pour the wet mix into the dry ingredients. Stir gently until combined. Be careful not to overmix. The batter should stay a bit lumpy for a light cake.
Pour the batter into a greased 8×8-inch baking dish. Bake for 25-30 minutes. Check if it’s done by inserting a toothpick; it should come out clean. After baking, let the cake cool completely on a wire rack. When cool, cut it into small cubes.
Assembling the Cake Jars
Now, it’s time to layer your cake jars. Grab individual jars or cups. Start with a layer of cake cubes. Then, add a layer of the macerated strawberries with some of their juices. Follow this with a thick layer of whipped cream. Repeat the layers until the jars are full. Finish with a dollop of whipped cream and 2-3 strawberry slices on top for decoration.
Finally, cover the jars and chill them in the fridge for at least one hour. This step lets all the flavors blend. Enjoy your Strawberry Shortcake Cake Jars!
Tips & Tricks
How to Get the Perfect Cake Texture
To get a light and fluffy cake, do not overmix your batter. Mix just until the dry and wet parts come together. A few lumps are okay! This keeps the cake airy. Also, make sure your ingredients are at room temperature. Warm butter and eggs mix better, giving you a great texture.
Enhancing Flavor with Vanilla and Other Extracts
Vanilla extract adds a warm, sweet flavor to your cake. You can also try almond extract for a nutty twist. Just a few drops can make a big difference. Mix these extracts into your wet ingredients. This helps spread the flavor throughout the cake.
Tricks for Layering in Jars
When you layer your jars, start with cake cubes. Then, add some of the sweet strawberries. Pour a little of the juices for extra taste. Top this with whipped cream. Repeat the layers until the jar is full. For the top, finish with whipped cream and a few strawberry slices. This way, each bite will be a tasty mix of flavors.
Try these tips for your Strawberry Shortcake Cake Jars to impress your family and friends!

Variations
Gluten-Free Option for Cake Jars
You can easily make gluten-free cake jars. Swap out the all-purpose flour for a gluten-free blend. Many brands work well for baking. Just ensure the blend has a good mix of flours and starches. Follow the same steps in the recipe, and you will have a tasty gluten-free treat.
Fruit Alternatives for Different Flavors
Strawberries are great, but you can try other fruits too. Blueberries, raspberries, or peaches can make awesome cake jars. Just slice them up and use the same method for macerating with sugar. Each fruit adds a unique twist to the flavor. Experiment with your favorites!
Custom Whipped Cream Ideas
While whipped cream is classic, you can add fun flavors. Mix in cocoa powder for chocolate whipped cream. Use peppermint extract for a refreshing kick. You can even fold in crushed cookies for a crunchy twist. Get creative to make your cake jars even more special.
Storage Information
Best Practices for Storing Cake Jars
To keep your Strawberry Shortcake Cake Jars fresh, store them in the fridge. Use airtight containers or cover jars tightly. This keeps the cake moist and the strawberries juicy. Avoid exposing them to air for long periods. If you have leftover whipped cream, store it separately to maintain its texture.
Recommended Storage Duration
Your cake jars will stay fresh for about 3 to 4 days in the fridge. After that, the strawberries may lose their flavor and texture. If you want to enjoy them later, consider freezing. This way, you can have a tasty dessert on hand anytime.
How to Freeze Assembled Cake Jars
To freeze your cake jars, first, let them cool completely. Then, cover each jar with a lid or plastic wrap. For best results, freeze jars without the whipped cream. This prevents it from becoming icy and grainy. When ready to eat, thaw the jars in the fridge overnight. Add whipped cream just before serving for the best taste.
FAQs
Can I make Strawberry Shortcake Cake Jars ahead of time?
Yes, you can make these jars a day in advance. This helps the flavors blend well. Just assemble the jars and cover them tightly. Keep them in the fridge until you are ready to serve. This makes it easy for parties or gatherings.
What is the best way to serve strawberry shortcake in jars?
Serving in jars is fun and simple! Use clear jars to show off the layers. Start with cake cubes, add strawberries, and top with whipped cream. You can also add a sprinkle of crushed cookies for crunch. Serve with spoons and enjoy the treat together.
Where can I buy pre-made strawberry shortcake jars?
You can find pre-made jars at some bakeries or grocery stores. Check the dessert section for options. However, making them at home is easy and fun. You can adjust the sweetness and freshness to your taste. Plus, nothing beats homemade treats!
Strawberry shortcake cake jars are a fun treat to make and enjoy. We discussed the key ingredients and tools you need. You learned how to prepare strawberries, bake the cake, and assemble the jars. I shared tips for getting the perfect cake texture and how to add flavor. We also looked at variations, storage tips, and answered common questions.
Now, grab your ingredients and make some cake jars today. They’re tasty, easy, and sure to impress!