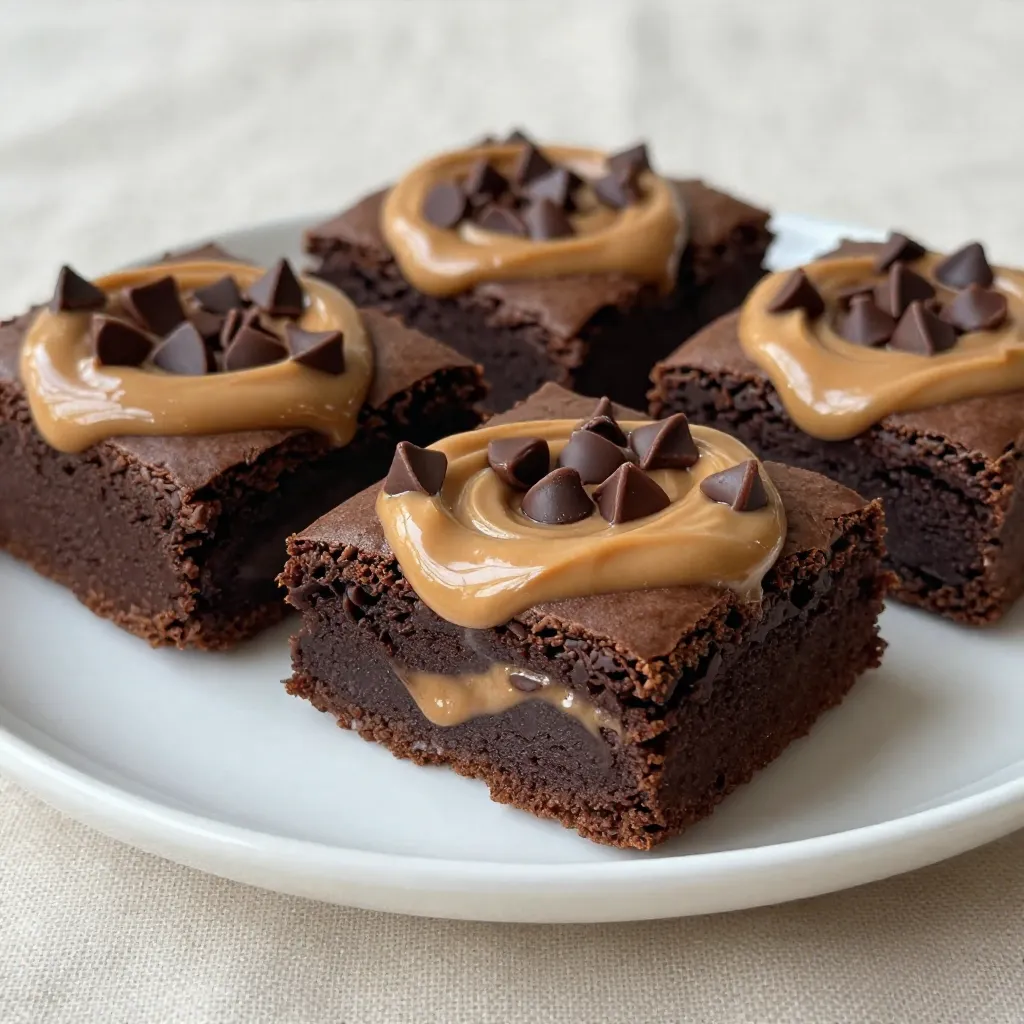
If you love rich, fudgy brownies, you’re in for a treat! Introducing my Peanut Butter Chocolate Swirl Brownies Delight Recipe—where creamy peanut butter meets rich chocolate in a blissful swirl. This recipe is simple, fun, and perfect for any occasion. Whether you’re baking for a party or a cozy night in, these brownies will impress everyone. Let’s dive in and whip up a batch that will have you craving more!
Why I Love This Recipe
- Decadent Flavor Combination: The rich chocolate and creamy peanut butter create a mouthwatering harmony that is simply irresistible.
- Easy to Make: This recipe requires minimal ingredients and straightforward steps, making it perfect for bakers of all levels.
- Customizable: Add your favorite mix-ins like nuts or extra chocolate chips to tailor the brownies to your taste.
- Perfect for Sharing: These brownies are ideal for gatherings, ensuring that everyone leaves with a satisfied sweet tooth.
Ingredients
List of Essential Ingredients
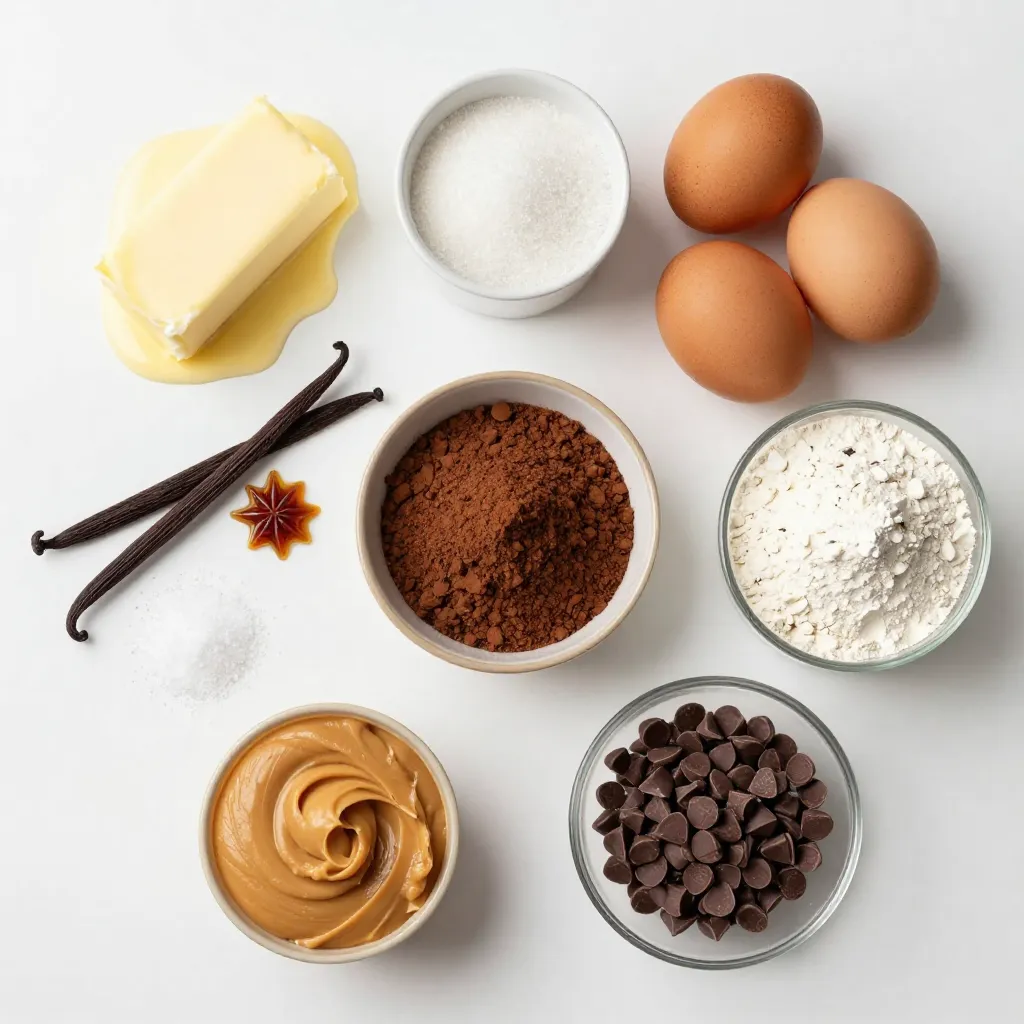
To make these delicious brownies, gather these key items:
– 1/2 cup unsalted butter, melted
– 1 cup granulated sugar
– 2 large eggs
– 1 teaspoon vanilla extract
– 1/3 cup unsweetened cocoa powder
– 1/2 cup all-purpose flour
– 1/4 teaspoon salt
– 1/4 teaspoon baking powder
– 1/2 cup creamy peanut butter
Optional Ingredients for Enhanced Flavor
For an extra treat, consider adding:
– 1/4 cup chocolate chips
These chocolate chips will boost the brownie’s chocolate flavor. They add little bursts of chocolatey goodness with each bite.
Tools Needed for Preparation
Make sure you have these tools ready:
– A 9×9-inch baking pan
– Mixing bowls
– A whisk
– A spatula
– A microwave-safe bowl
– A knife or skewer for swirling
Having the right tools makes baking much easier and more fun!
Step-by-Step Instructions
Prepping the Baking Pan
Start by preheating your oven to 350°F (175°C). This step helps the brownies bake evenly. Take a 9×9-inch baking pan, and grease it well. You can also line it with parchment paper. This makes it easier to lift the brownies out later.
Mixing the Batter
In a large bowl, pour in the melted butter and granulated sugar. Whisk them together until smooth. Next, add the eggs one at a time. Whisk after each egg to mix well. Then, stir in the vanilla extract. Sift in the cocoa powder, flour, salt, and baking powder. Gently fold these dry ingredients into the wet mixture. Be careful not to overmix, or your brownies may turn out dense.
Creating the Peanut Butter Chocolate Swirl
Pour three-quarters of the brownie batter into the prepared pan. Spread it evenly with a spatula. In a small bowl, microwave the peanut butter for about 20-30 seconds. This makes it easier to drizzle. Pour the warm peanut butter over the brownie base. Now, take the remaining batter and dollop it over the peanut butter. Use a knife or skewer to swirl the two batters together. This creates a lovely marbled effect.
Baking and Cooling the Brownies
Place the pan in the preheated oven. Bake for 20-25 minutes. To check if they are done, insert a toothpick into the center. It should come out mostly clean, with a few moist crumbs. After baking, let the brownies cool in the pan for at least 10 minutes. If you used parchment paper, lift them out carefully before cutting into squares.
Tips & Tricks
Achieving the Perfect Brownie Texture
To get the best brownie texture, focus on mixing. Start with melted butter and sugar. Whisk them well until they blend smoothly. Next, add eggs one at a time. This helps create a nice, airy mix. When you add dry ingredients, mix gently. Overmixing makes them tough. Your batter should be thick but pourable.
Swirling Techniques for Design
Swirling adds beauty to your brownies. After pouring the peanut butter, dollop the brownie batter on top. Use a knife or skewer to swirl gently. Move in an “S” shape for a lovely marbled look. Don’t go too deep. You want to see both colors. The top will look amazing when baked.
Ways to Personalize Your Brownies
Make these brownies your own! Add nuts like walnuts or pecans for crunch. You can also try different chocolate types, like dark or milk. Want a little spice? Add a pinch of cinnamon or espresso powder. For a fun twist, mix in some crushed candies. This gives your brownies unique flavors and textures.
Pro Tips
- Use Room Temperature Ingredients: For the best texture, ensure your eggs and peanut butter are at room temperature before mixing. This helps create a smoother batter.
- Don’t Overmix: When combining the dry ingredients with the wet, mix just until combined. Overmixing can lead to tough brownies.
- Check for Doneness Carefully: Insert a toothpick into the center of the brownies. It should come out with a few moist crumbs, indicating they are perfectly fudgy.
- Cool Before Cutting: Allow the brownies to cool in the pan for at least 10 minutes. This helps them set and makes cutting easier without crumbling.
Variations
Nut-Free Peanut Butter Alternatives
If you want to make these brownies nut-free, you can try sun butter. This spread comes from sunflower seeds and tastes great. Another option is soy nut butter, which is also nut-free. Both choices work well in place of peanut butter. Just use the same amount as the recipe calls for. These swaps keep the brownies rich and tasty.
Adding Mix-ins and Toppings
Mix-ins can make these brownies even more fun. You can add a handful of chocolate chips or chopped nuts. For a fruity twist, try dried cherries or raspberries. You can sprinkle these on top before you bake. You can also add a layer of caramel sauce for extra sweetness. Just drizzle it before swirling the batters.
Gluten-Free Substitutions
If you want gluten-free brownies, swap the all-purpose flour for a gluten-free blend. Many brands offer great mixes that work well in baking. You can also use almond flour or coconut flour, but adjust the amounts. Start with less and add as needed for the right texture. Just remember, the baking time might change slightly, so keep an eye on them!
Storage Info
Best Practices for Storing Brownies
To keep your peanut butter chocolate swirl brownies fresh, store them in an airtight container. This helps maintain their softness and flavor. Place a piece of parchment paper between layers to avoid sticking. Store them at room temperature for up to 3 days. For longer storage, consider freezing.
How to Freeze Brownies for Later
Freezing brownies is simple. First, let them cool completely. Then, cut them into squares. Wrap each square tightly in plastic wrap. Place the wrapped brownies in a freezer-safe bag or container. They can last up to 3 months in the freezer. When you’re ready to eat, just thaw them at room temperature.
Reheating Tips for Softness
To enjoy your brownies warm, preheat your oven to 350°F (175°C). Place the brownies on a baking sheet. Heat them for about 5 to 10 minutes. This will restore their soft texture. For a quick fix, you can also microwave a square for 10 to 15 seconds. Enjoy them warm!
FAQs
How do I know when my brownies are done?
You can tell your brownies are done when a toothpick comes out mostly clean. Insert it into the center of the brownies. If it has a few moist crumbs, they are ready. If the toothpick has wet batter, bake for a few more minutes. Keep an eye on them!
Can I use oil instead of butter?
Yes, you can use oil instead of butter. Use a light oil, like canola or vegetable oil. Replace the butter with the same amount of oil, but the taste will change a bit. Brownies may taste less rich but will still be soft and good.
How can I make these brownies more chocolatey?
To make brownies more chocolatey, add chocolate chips. Mix in 1/4 cup of chocolate chips into the batter. You can also use dark cocoa powder instead of regular cocoa powder. This change will boost the chocolate flavor.
What is the best way to cut brownies for clean edges?
For clean edges, let the brownies cool first. Use a sharp knife to cut them. Wipe the knife with a damp cloth between cuts. This step helps keep the edges neat. You can also chill the brownies for a bit before cutting to make this easier.
You now have all you need to make awesome brownies. We covered the key ingredients, with options to boost flavor. I shared simple steps for mixing, swirling, and baking. I also gave you tips for texture and personalization. Plus, I included variations for different diets and preferences. Finally, I shared how to store and reheat your tasty treats.
With these insights, you can create perfect brownies every time. Happy bakin