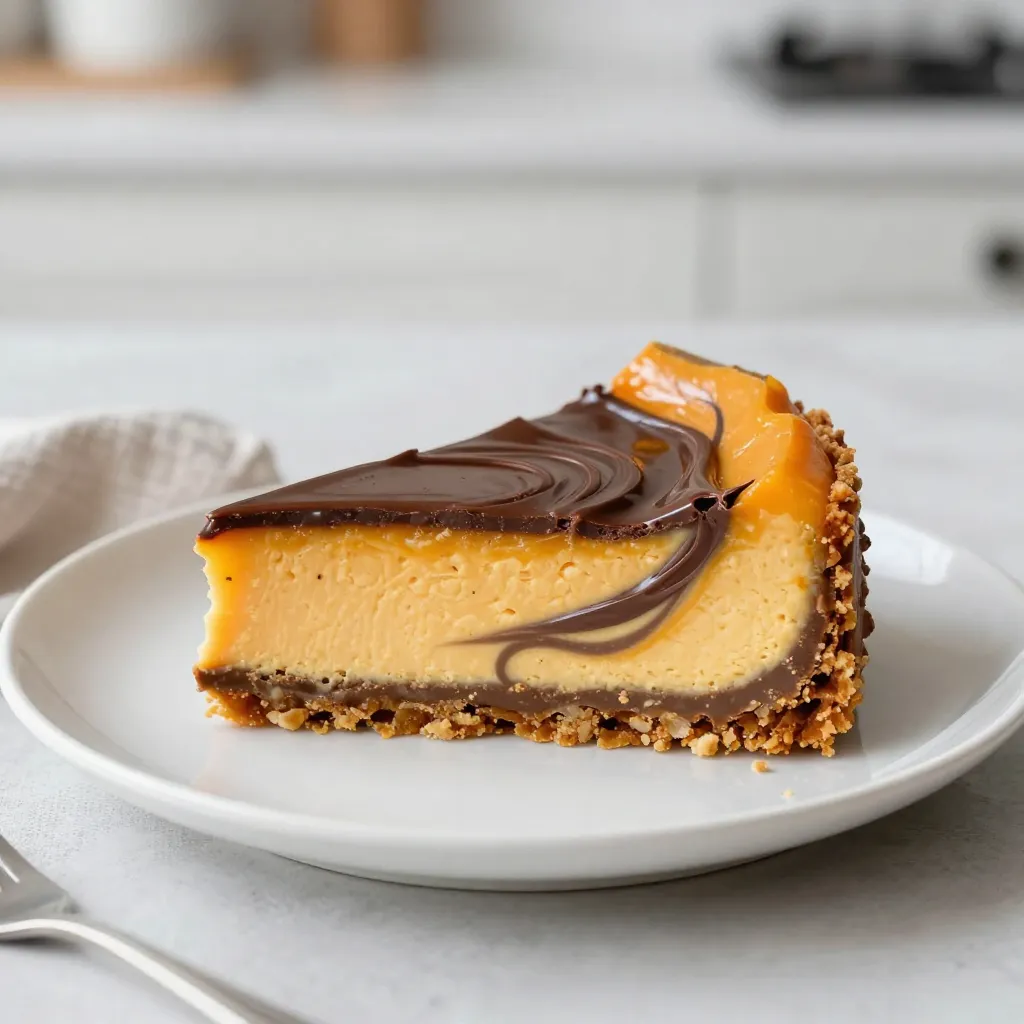
Are you ready to impress your friends with a dessert they won’t forget? This Chocolate Swirl Pumpkin Cheesecake combines rich chocolate and spiced pumpkin flavors in a creamy masterpiece. Whether it’s for a holiday gathering or a cozy evening at home, this recipe is sure to delight every palate. Let’s grab our ingredients and create something truly special that will have everyone asking for seconds!
Why I Love This Recipe
- Perfect Fall Flavor: This cheesecake combines the warm spices of pumpkin pie with rich chocolate, making it an ideal dessert for autumn gatherings.
- Impressive Presentation: The marbled chocolate and pumpkin layers create a visually stunning dessert that is sure to impress guests.
- Easy to Make: Despite its elegant appearance, this cheesecake is straightforward to prepare, making it perfect for both novice and experienced bakers.
- Decadent Texture: The creamy filling and buttery crust create a rich, satisfying dessert that melts in your mouth with every bite.
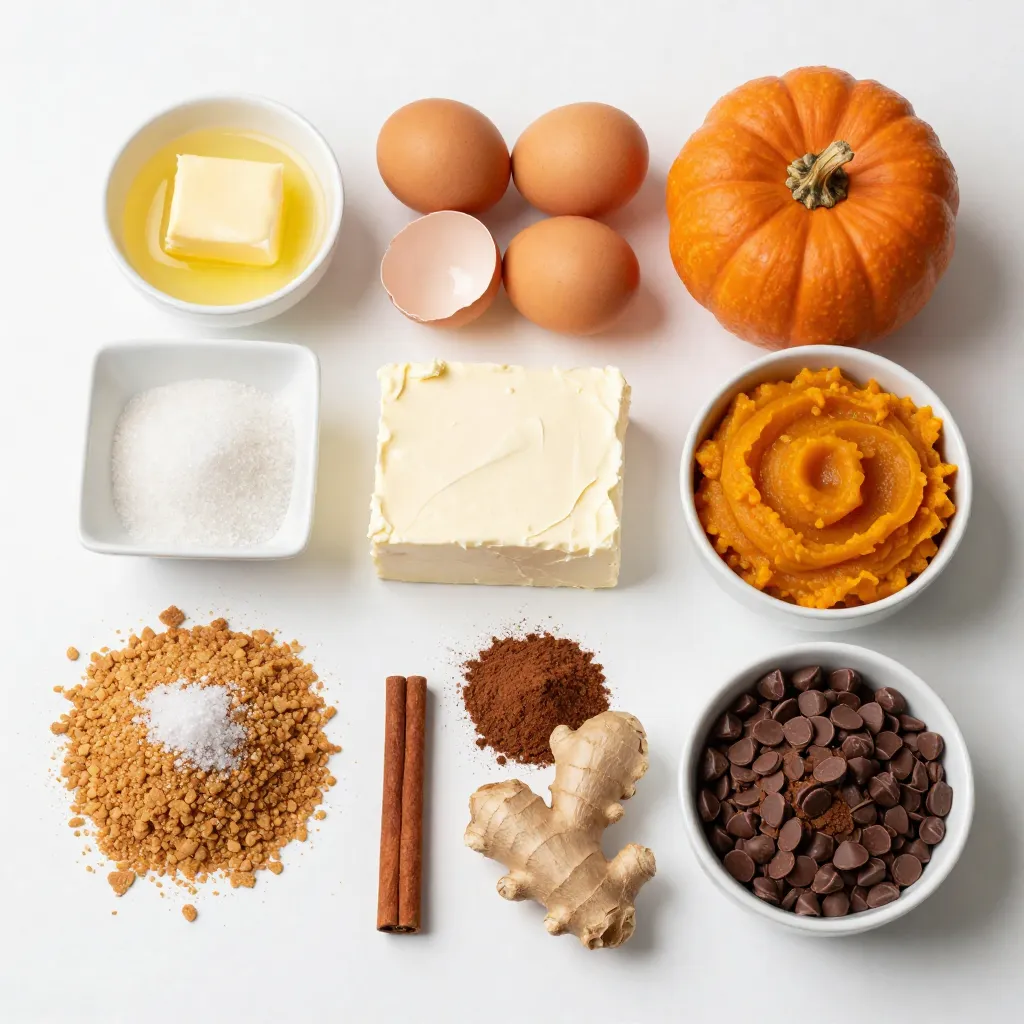
Ingredients
Essential Ingredients for Cheesecake
– 24 oz cream cheese, softened
– 1 cup pumpkin puree
– 1 cup granulated sugar
– 1 teaspoon vanilla extract
– 1 teaspoon ground cinnamon
– 1 teaspoon ground nutmeg
– ½ teaspoon ground ginger
The cream cheese is the base. It gives the cheesecake its rich and creamy texture. I like to use softened cream cheese. This makes it easier to mix. The pumpkin puree adds flavor and moisture. It makes the cheesecake taste like fall.
Sugar sweetens the mix. I use granulated sugar for this recipe. The spices bring warmth. Cinnamon, nutmeg, and ginger work well together. They create a lovely autumn flavor in each bite.
Crust Components
– 1 ½ cups graham cracker crumbs
– ½ cup unsalted butter, melted
– 2 tablespoons granulated sugar
The crust is a key part of this cheesecake. I use graham cracker crumbs. They give a nice crunch and sweetness. Mixing them with melted butter helps hold it all together.
The sugar adds a touch of sweetness. Pressing the mixture firmly into the pan is important. This helps it stay together when you slice it.
Chocolate Swirl Ingredients
– ½ cup semi-sweet chocolate chips, melted
– 2 tablespoons cocoa powder
The chocolate swirl is what makes this cheesecake special. I use semi-sweet chocolate chips for a rich taste. Melting them makes it easy to mix.
Cocoa powder adds an extra chocolate flavor. It deepens the taste of the swirl. Together, they create a beautiful marbled look in the cheesecake. This makes it fun and fancy for any gathering.
Step-by-Step Instructions
Prepping the Oven and Pan
– Preheating the Oven: Start by setting your oven to 325°F (163°C). This step gets it ready for baking.
– Preparing the Springform Pan: Grease a 9-inch springform pan. Use cooking spray or butter so the cheesecake comes out easily later.
Making the Crust
– Combining Ingredients: In a medium bowl, mix 1 ½ cups graham cracker crumbs, ½ cup melted unsalted butter, and 2 tablespoons granulated sugar. Stir this until it looks like damp sand.
– Baking the Crust: Press the mixture into the bottom of the springform pan. Make it even and flat. Bake for 10 minutes. Remove it from the oven and let it cool.
Preparing the Cheesecake Filling
– Beating the Cream Cheese: In a large bowl, use an electric mixer to beat 24 oz of softened cream cheese until smooth. This may take a minute or two.
– Incorporating Pumpkin and Eggs: Gradually mix in 1 cup of sugar. Then, add 1 cup of pumpkin puree and 3 large eggs one at a time. Mix well after each addition. Don’t forget to add 1 teaspoon of vanilla extract and spices: 1 teaspoon cinnamon, 1 teaspoon nutmeg, and ½ teaspoon ginger. Blend until smooth.
Creating the Chocolate Swirl
– Mixing the Chocolate and Cocoa: In a small bowl, combine ½ cup melted semi-sweet chocolate chips with 2 tablespoons cocoa powder. Stir until there are no lumps.
– Layering the Cheesecake: Pour half of your pumpkin cheesecake batter into the cooled crust. Spoon dollops of the chocolate mix on top.
Baking and Cooling Process
– Baking Duration: Bake in the oven for 55 to 60 minutes. It’s done when the center is set but still jiggles a bit.
– Cooling Technique: After baking, turn off the oven and crack the door open. Let the cheesecake cool in the oven. This prevents cracks on the top.
Final Chilling and Serving
– Refrigeration Time: Once cooled, place the cheesecake in the fridge for at least 4 hours. If you can wait overnight, do it for better flavor.
– How to Serve: To serve, run a knife around the edges of the pan. Carefully remove the sides of the springform pan. Slice and enjoy!
Tips & Tricks
Perfecting the Texture
To get the best texture for your cheesecake, avoid cracks. Cracks often happen when the cheesecake cools too fast. After baking, turn off the oven and open the door a bit. This lets it cool slowly, keeping it smooth.
Enhancing Flavor
Adjust spices for a richer taste. You can add more cinnamon or nutmeg if you like. For sweetness, taste the batter before baking and add a bit more sugar if needed.
Presentation Suggestions
Serve slices on dessert plates to make each piece special. You can add a dollop of whipped cream or a sprinkle of cocoa powder on top. These simple touches make your cheesecake look great and taste even better.
Pro Tips
- Use Room Temperature Ingredients: Ensure your cream cheese and eggs are at room temperature before mixing. This helps to create a smoother and creamier cheesecake filling without lumps.
- Don’t Overmix: When incorporating the eggs into the mixture, mix just until combined. Overmixing can introduce too much air, leading to cracks during baking.
- Prevent Cracks: The gradual cooling method helps minimize cracks. After baking, cool the cheesecake in the oven with the door slightly ajar to allow it to set without sudden temperature changes.
- Flavor Enhancements: For an extra flavor boost, consider adding a pinch of salt to the filling or using flavored chocolate (like dark chocolate) for the swirl to complement the pumpkin.
Variations
Alternative Flavors
You can change the flavors to suit your taste. Try different pie fillings, like apple or pecan. Each will give your cheesecake a unique twist. You can also use other chocolates. White chocolate or dark chocolate can add richness. Mixing flavors opens up a world of fun!
Crust Alternatives
If you need a gluten-free option, consider almond flour or gluten-free cookies. They work well in this recipe. For a fun twist, try using different cracker options. Chocolate wafers or even gingersnap cookies can add a unique taste to your crust.
Dietary Modifications
For a vegan version, replace cream cheese with cashew cream or vegan cheese. Use flax eggs instead of regular eggs. You can also create a low-sugar version. Use natural sweeteners like stevia or monk fruit. These changes can keep your cheesecake delicious and friendly for various diets.
Storage Info
Optimal Storage Conditions
– Refrigeration Guidelines: After your cheesecake cools, cover it tightly. Use plastic wrap or a lid. Store it in the fridge for up to five days. This keeps it fresh and tasty.
– Freezing Instructions: If you want to save it longer, freeze the cheesecake. Slice it first for easy serving later. Wrap each slice in plastic wrap, then foil. It can last up to three months in the freezer.
Shelf Life
– How Long Does It Last? In the fridge, your cheesecake stays good for about five days. In the freezer, it can last three months.
– Signs of Spoilage: Check for any off smell or changes in color. If it looks dry or has a crust, it’s time to toss it.
Reheating Instructions
– How to Safely Reheat Cheesecake: If you want to reheat, do it slowly. Set the oven to 250°F (120°C). Heat for about 10-15 minutes. This keeps the texture nice.
– Best Methods for Serving Leftovers: Serve chilled or at room temperature. If you like, add a dollop of whipped cream or a sprinkle of cocoa on top. This adds a nice touch!
FAQs
What is the best way to thaw frozen cheesecake?
To thaw frozen cheesecake, place it in the fridge overnight. This method helps keep the texture smooth. You can also leave it at room temperature for about two hours. Avoid using a microwave, as it can change the texture.
Can I make this recipe ahead of time?
Yes, you can make this cheesecake ahead of time. It tastes even better after chilling overnight. Prepare it a day or two before your event. Just store it in the fridge until you are ready to serve.
How can I tell when the cheesecake is done baking?
The cheesecake is done when the edges are set and the center has a slight jiggle. This means it will firm up as it cools. Keep an eye on it during the last 10 minutes of baking to avoid overcooking.
Can I use pumpkin pie filling instead of pumpkin puree?
I do not recommend using pumpkin pie filling. It has added spices and sugar. This can change the flavor and texture of your cheesecake. Stick to pure pumpkin puree for the best results.
What can I substitute for cream cheese?
You can use mascarpone cheese or ricotta cheese as a substitute. Both can give a unique flavor and texture. For a lighter option, use Greek yogurt. Just remember that the taste may vary slightly.
This blog post covers everything you need to know about making a delicious cheesecake. We explored essential ingredients like cream cheese, pumpkin puree, and chocolate. I shared step-by-step instructions to ensure your cheesecake has the perfect texture and flavor.
Remember, you can always try different flavors and crust types to make this dessert your own. Store your cheesecake properly to enjoy it longer. With these tips and insights, you’re ready to impress with your cheesecake skills. Enjoy bakin