Craving a sweet treat that’s easy to make? Try my Chocolate Peanut Butter Cheesecake Dip! This dip pairs rich chocolate and creamy peanut butter for an indulgent experience that is hard to resist. Perfect for parties or a cozy night in, you’ll find classic ingredients plus some fun twists. Let’s dive into the simple steps to make your new favorite dessert. Trust me, you won’t want to miss this!
Why I Love This Recipe
- Irresistible Flavor: This dip combines the rich taste of chocolate and the creamy goodness of peanut butter, making it a delightful treat for anyone with a sweet tooth.
- Quick and Easy: With just 15 minutes of prep time, this recipe is perfect for last-minute gatherings or a quick indulgent snack.
- Customizable Delight: You can easily adjust the recipe by adding your favorite mix-ins like nuts or different types of chocolate, making it perfect for any occasion.
- Fun for Everyone: Pair it with fresh fruits or graham crackers for dipping, making it a fun and interactive dessert option for parties and family gatherings.
Ingredients
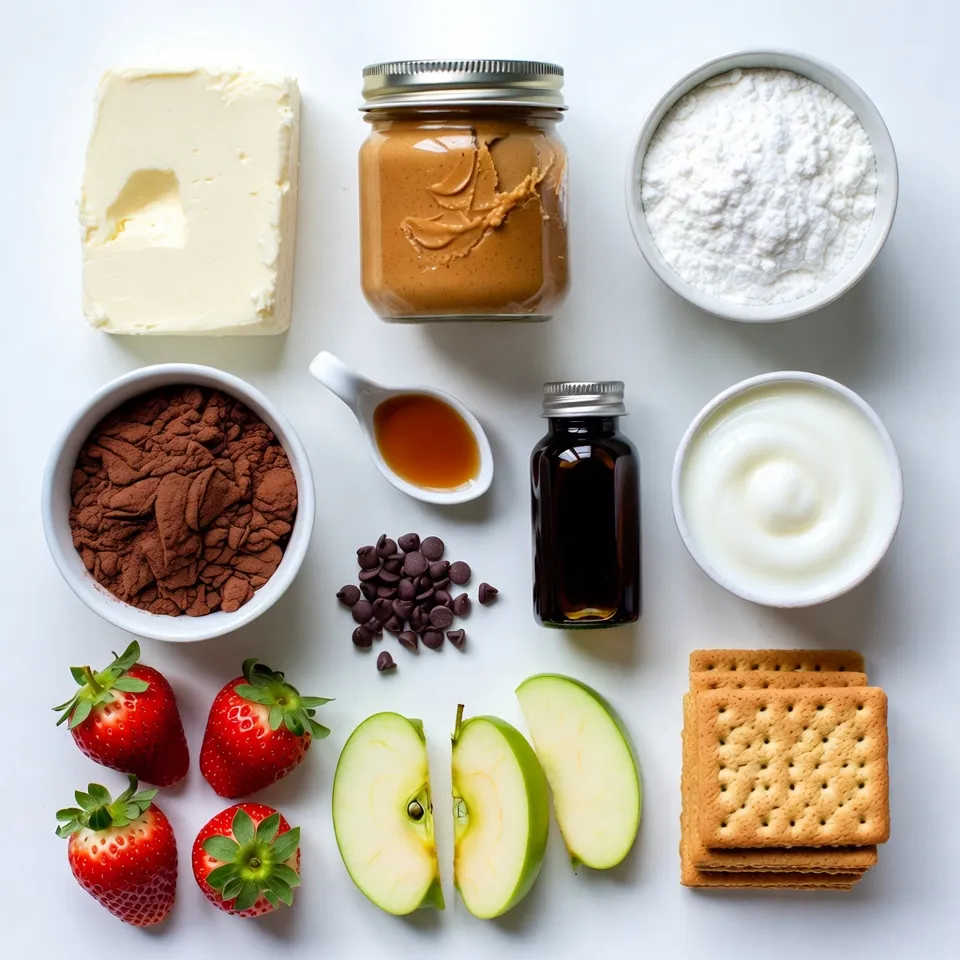
List of Ingredients
– 8 oz cream cheese, softened to room temperature
– 1 cup creamy peanut butter
– 1 cup powdered sugar
– 1/2 cup unsweetened cocoa powder
– 1 teaspoon pure vanilla extract
– 1/2 cup heavy whipping cream
– 1/4 cup mini chocolate chips (optional)
Optional Ingredients for Extra Flavor
You can add more fun to your dip. Some great options include:
– A pinch of sea salt for a flavor boost
– A splash of coffee for depth
– A dash of cinnamon for warmth
Suggested Dipping Options
This dip pairs well with many tasty treats. Here are my favorites:
– Fresh fruits like strawberries and apple slices
– Graham crackers for a crunchy bite
– Pretzels for a salty contrast
– Cookies for a sweet touch
Choose your favorites and enjoy the dip!
Step-by-Step Instructions
Mixing the Base
Start by taking your large mixing bowl. Add in 8 ounces of softened cream cheese and 1 cup of creamy peanut butter. Use an electric mixer on medium speed. Beat the mixture until it becomes smooth. Scrape the sides of the bowl to get every bit mixed well. This step is key for a creamy base.
Adding Sweetness and Flavor
Now, it’s time to add sweetness. Gradually sift in 1 cup of powdered sugar and 1/2 cup of unsweetened cocoa powder. Keep the mixer on low speed to avoid a sugary cloud. Make sure to scrape the bowl again to mix everything evenly. Finally, add 1 teaspoon of pure vanilla extract. Blend it well to enhance the dip’s flavor.
Whipping the Cream
In a separate chilled bowl, pour in 1/2 cup of heavy whipping cream. Use a hand mixer or stand mixer on high speed. Whip until stiff peaks form. This will make your dip light and fluffy. Next, carefully fold this whipped cream into the chocolate peanut butter mixture. Use a rubber spatula and make gentle motions. If you want, you can add 1/4 cup of mini chocolate chips at this stage for extra crunch. Once mixed, transfer the dip to a serving bowl. Chill it in the fridge for at least 30 minutes. This helps the flavors blend and tastes even better.
Tips & Tricks
Common Mistakes to Avoid
When making your chocolate peanut butter cheesecake dip, watch out for a few common mistakes. First, don’t skip softening your cream cheese. If it’s too cold, the dip will be lumpy. Always mix the cream cheese and peanut butter until smooth. Next, avoid adding all the sugar and cocoa at once. Gradually sifting them in helps prevent clumps. Finally, be gentle when folding in the whipped cream. This keeps your dip light and airy.
How to Achieve the Perfect Texture
For a rich and creamy texture, start with room-temperature cream cheese. Beat it well with peanut butter until it’s silky. Gradually add the powdered sugar and cocoa. This step is key for smoothness. Whipping the cream is also crucial. Whip until stiff peaks form, then fold it in gently. This adds a lightness that balances the dip’s richness.
Best Presentation Ideas
Presentation can make your dip even more fun. Serve it in a pretty bowl, and smooth the top for a polished look. Drizzle melted chocolate over the dip for a decadent touch. You can sprinkle extra mini chocolate chips on top for added crunch. Surround the bowl with fresh fruits like strawberries and apple slices or graham crackers. This colorful display invites everyone to dig in and enjoy!
Pro Tips
- Use Room Temperature Ingredients: Allowing your cream cheese and peanut butter to reach room temperature before mixing will create a smoother and creamier dip, free of lumps.
- Chill Before Serving: Make sure to refrigerate the dip for at least 30 minutes before serving to enhance the flavors and achieve the perfect texture.
- Experiment with Dippers: Fresh fruits, such as bananas or apples, can complement the dip beautifully. For a crunch, graham crackers or pretzels are excellent choices.
- Customize Your Sweetness: Adjust the amount of powdered sugar based on your taste preference. If you prefer a less sweet dip, start with half the amount and adjust to your liking.
Variations
Alternative Add-Ins
You can easily customize this dip with fun add-ins. Try using white chocolate chips for a twist. You can also add butterscotch chips for a different flavor. Chopped nuts like peanuts or almonds add a nice crunch. For a fruity touch, mix in dried fruits like cranberries or raisins. Each option brings a unique taste that can surprise your friends.
Making it Healthier
Want a healthier version? Swap the cream cheese for Greek yogurt. This keeps the dip creamy while adding protein. You can also cut back on the sugar. Use a natural sweetener like honey or maple syrup instead. This makes the dip lighter without sacrificing flavor. It’s a smart choice for those watching their sugar intake.
Seasonal Twists
Seasonal flavors can make this dip even more fun. In the fall, add pumpkin spice to bring warmth and coziness. For a summer twist, mix in fresh berries for a burst of flavor. You can also try peppermint extract during the winter holidays. Each season offers a chance to get creative and enjoy different tastes.
Storage Info
How to Store Leftovers
To keep your dip fresh, store it in a tightly sealed container. This helps lock in the flavor. If you have leftovers, scoop them into a bowl and cover it with plastic wrap. Make sure it touches the dip to help avoid drying out.
Recommended Storage Containers
I suggest using glass containers or plastic airtight ones. Glass keeps the dip cool and makes it easy to see. Plastic containers are lighter and great for taking to events. Both options keep your dip safe and delicious.
Shelf Life Tips
This dip stays fresh in the fridge for about 3 to 5 days. After that, the texture may change. Always check for any off smells or flavors before serving. If you want to keep it longer, you can freeze it. Just make sure to thaw it in the fridge before enjoying it again.
FAQs
Can I make this dip ahead of time?
Yes, you can make this dip one day in advance. This allows the flavors to blend well. Just store it in an airtight container in the fridge. When ready to serve, give it a quick stir. If it seems too thick, mix in a little milk for a smoother texture.
How do I make it less sweet?
To reduce the sweetness, cut back on the powdered sugar. Start with half a cup and taste as you go. You can also add a pinch of salt. This helps balance the sweetness and enhances the chocolate flavor.
What can I substitute for heavy cream?
If you don’t have heavy cream, use full-fat coconut milk or Greek yogurt. Both will add creaminess. For a lighter option, try whipped topping or milk with a bit of cornstarch to thicken it. Adjust the amount based on your desired texture.
In this blog post, we explored all aspects of making the perfect dip. We reviewed essential and optional ingredients, along with tasty dipping options. I shared step-by-step instructions to mix, sweeten, and whip your dip just right. We discussed tips to avoid common mistakes and create the best texture. You can also try fun variations, from healthier swaps to seasonal flavors. Finally, I emphasized the importance of proper storage to keep your dip fresh. Enjoy making this dip your own and sharing it with other