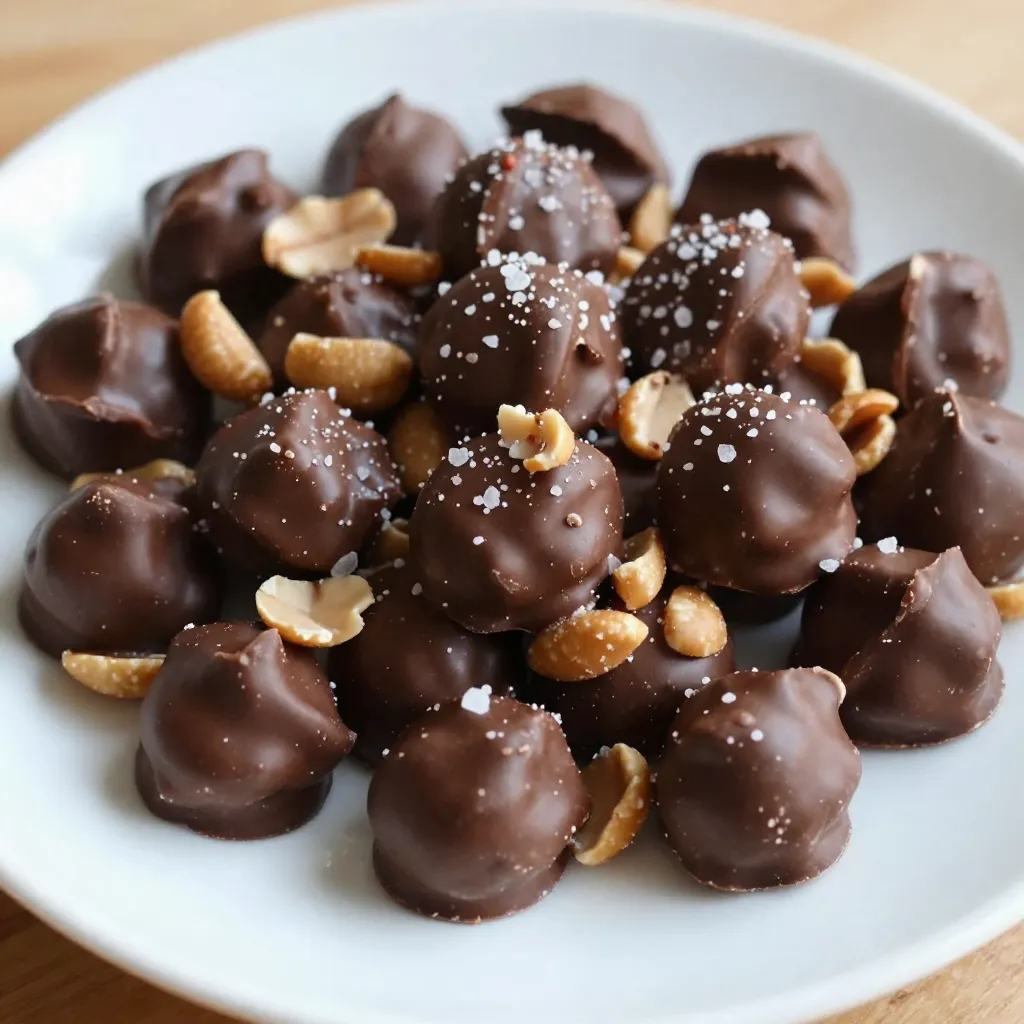
Imagine sinking your teeth into a sweet, crunchy chocolate-covered peanut cluster. It’s the perfect treat! In this post, I’ll share my simple recipe for these dreamy snacks, packed with flavor and crunch. Whether you’re craving a quick dessert or a gift idea, you’ll find tips and tricks to make your clusters just right. Let’s dive into the world of chocolate-covered peanut clusters and satisfy that snack need!
Why I Love This Recipe
- Easy to Make: This recipe requires minimal ingredients and can be prepared in just 10 minutes, making it perfect for a quick treat.
- Perfect for Gifting: These chocolate-covered peanut clusters look beautiful and taste amazing, making them a thoughtful gift for friends and family.
- Customizable: You can easily adapt this recipe by using different types of nuts or chocolate to suit your taste preferences.
- Delicious Flavor Combination: The sweet chocolate paired with the salty crunch of peanuts creates an irresistible flavor that keeps you coming back for more.
Ingredients
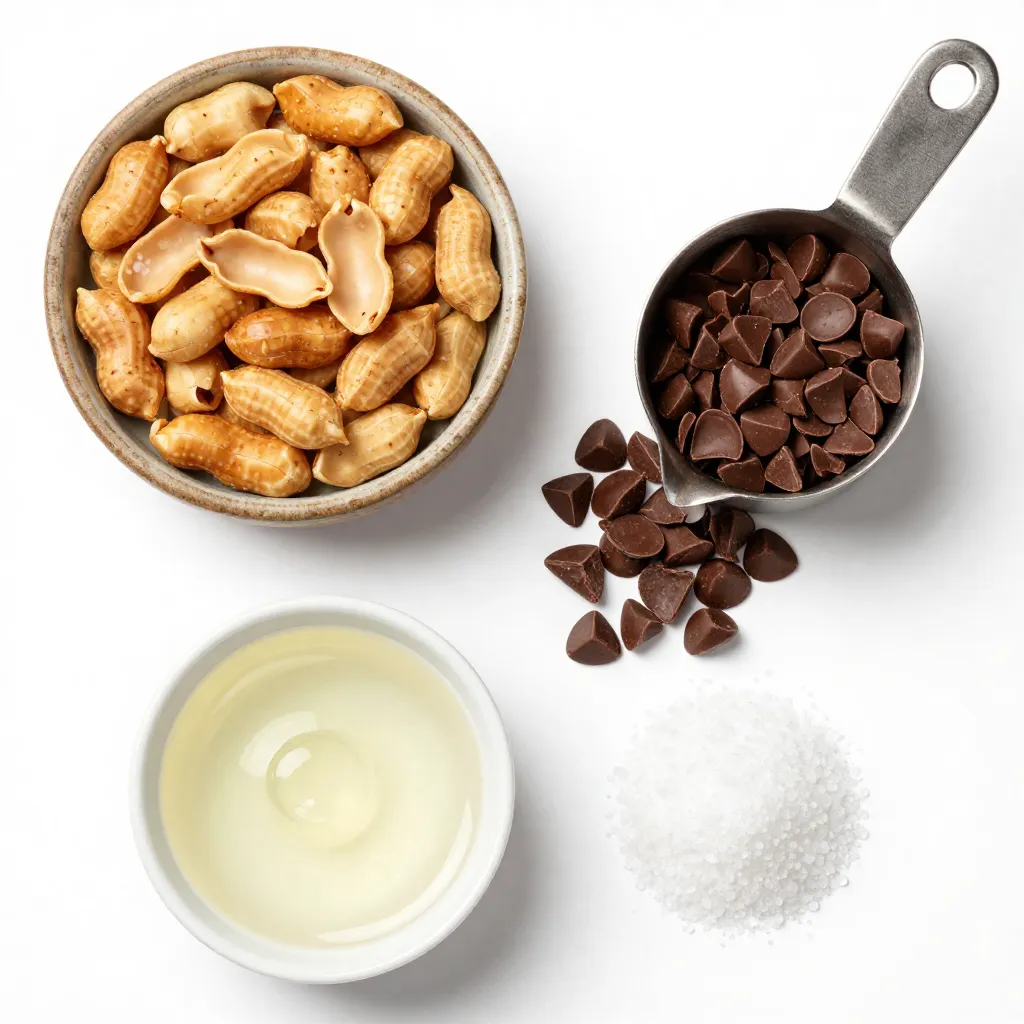
List of Ingredients
– 2 cups roasted peanuts (unsalted)
– 1 cup semi-sweet chocolate chips
– 1 tablespoon coconut oil (optional)
– Sea salt (for finishing touch)
These simple ingredients make a delightful treat. Start with the unsalted peanuts. They give a nice crunch without extra salt. Next, the semi-sweet chocolate chips create a sweet and rich flavor. If you want a smoother chocolate, add coconut oil. It helps the chocolate melt evenly and adds a nice finish. Finally, sprinkle sea salt on top to balance the sweetness. The salt enhances every bite and makes the flavors pop.
Gather these ingredients before you start. This will help you move quickly through the recipe. With just four items, you are close to making a tasty snack!
Step-by-Step Instructions
Preparation of the Baking Sheet
Start by lining a baking sheet with parchment paper. This paper helps the clusters not stick, making your life easier. It also means less mess to clean up later. The parchment allows for quick removal of the clusters when they are set.
Melting the Chocolate
In a microwave-safe bowl, add the semi-sweet chocolate chips. If you want a silkier texture, add the coconut oil now. Heat the bowl in the microwave using 30-second intervals. After each interval, stir the chocolate to help it melt evenly. Keep doing this until the chocolate is smooth and creamy.
Combining the Ingredients
Once your chocolate is ready, gently fold in the roasted peanuts. Use a spatula for this step. Make sure every peanut gets coated in chocolate. This ensures each bite will be delicious.
Shaping the Clusters
Now it’s time to shape your clusters. You can use a tablespoon or a small ice cream scoop. Drop generous mounds of the mixture onto your lined baking sheet. Aim for a rounded shape to get that classic cluster look. Avoid making them flat; you want them to have some height.
Seasoning with Sea Salt
While the chocolate is still warm, sprinkle a pinch of sea salt on each cluster. This adds a nice salty contrast to the sweet chocolate. Timing is key; do it while the chocolate is warm. This step enhances the overall flavor and makes each bite pop.
Chilling and Setting
Transfer the baking sheet to the refrigerator. Let the clusters chill for about 30 minutes. This is the perfect time for the chocolate to harden. You’ll know they are ready when the chocolate feels firm to the touch. Then, enjoy your tasty treat!
Tips & Tricks
Best Chocolate Brands
For the best flavor, I recommend using semi-sweet chocolate chips. Brands like Ghirardelli or Guittard offer a rich taste. They melt well and coat the peanuts perfectly. If you want to try something different, consider dark chocolate for a deeper flavor or milk chocolate for a sweeter bite. Each chocolate brings its own charm to the clusters.
Achieving the Right Texture
To get a smooth texture, you can add coconut oil. This step is optional but helps make the chocolate silkier. Be careful not to use too much. Start with just one tablespoon. When melting chocolate, heat it slowly. Use 30-second bursts in the microwave. Stir well in between to avoid burning. If the chocolate gets too hot, it can seize and become grainy.
Serving Suggestions
These clusters make great gifts! You can place them in small bags or boxes and tie them with ribbon. They look lovely and taste even better. For drinks, pair them with coffee or hot cocoa. The salty-sweet mix of the clusters goes well with both. You can also serve them with fresh fruit for a balanced snack.
Pro Tips
- Use Quality Chocolate: Opt for high-quality semi-sweet chocolate chips for the best flavor and texture. The better the chocolate, the more delicious your clusters will be!
- Experiment with Mix-ins: Feel free to add other ingredients like dried fruits, mini marshmallows, or even a splash of vanilla extract to customize your clusters and add more flavor.
- Store Properly: To keep your clusters fresh, store them in an airtight container in a cool, dry place. If you live in a warm climate, refrigeration may be necessary to maintain their shape.
- Perfect Portioning: For evenly sized clusters, use a small ice cream scoop or cookie scoop. This ensures that each cluster is a consistent size, making them more visually appealing.
Variations
Alternative Nut Options
You can switch peanuts for other nuts. Almonds and cashews work great. Each nut brings its own flavor. Almonds have a nice crunch, while cashews are creamy. Try mixing different nuts for fun textures and tastes.
Adding Extra Ingredients
Want to jazz up your clusters? Add dried fruits like cranberries or raisins. Seeds like sunflower or pumpkin can also add a crunch. You can flavor your chocolate with vanilla or a hint of espresso. These options create a unique twist on a classic snack.
Vegan and Dairy-Free Versions
If you prefer vegan treats, use dairy-free chocolate. Look for chocolate chips made with almond or coconut milk. You can also replace coconut oil with a nut butter for creaminess. These swaps keep your snack tasty and suitable for everyone.
Storage Info
Best Storage Practices
To keep your chocolate covered peanut clusters fresh, store them in an airtight container. This prevents air from making them stale. You can keep them at room temperature for a day or two. However, if you want them to last longer, put them in the fridge. The cold will help keep them firm and tasty.
Shelf Life
For optimal freshness, enjoy your clusters within a week. After that, they may lose their crunch and flavor. Signs of spoilage include a dull appearance or a strange smell. If you notice these, it’s best to toss them.
Freezing Clusters
Freezing is a great option if you want to save some for later. First, let the clusters cool completely. Then, place them in a single layer on a baking sheet. Freeze them for about two hours until hard. Once frozen, transfer them to a freezer-safe bag or container. When you’re ready to eat, thaw them in the fridge for best results. This keeps them from getting mushy.
FAQs
How long do chocolate covered peanut clusters last?
Chocolate covered peanut clusters can last about two weeks. Store them in an airtight container. Keep them at room temperature for the best taste. If you refrigerate, they may last a bit longer, up to three weeks. Just check for any signs of melting or changes in texture.
Can I use different types of chocolate?
Yes, you can use many types of chocolate. Milk chocolate gives a sweet flavor. Dark chocolate adds a rich taste. White chocolate adds creaminess. Just choose what you love most. Mixing different chocolates can create fun flavors too.
What’s the best way to melt chocolate without burning it?
To melt chocolate safely, use a microwave or a double boiler. If using the microwave, heat in 30-second intervals. Stir between each interval. This helps prevent burning. If using a double boiler, keep the water at a gentle simmer. Stir the chocolate until smooth.
Are chocolate covered peanut clusters gluten-free?
Yes, chocolate covered peanut clusters are gluten-free. The main ingredients are peanuts and chocolate. Just check your chocolate labels for any added ingredients. Most chocolate chips are gluten-free, but it’s always smart to check.
Can I make these clusters ahead of time?
You can make these clusters ahead of time. They store well in an airtight container. Make them a few days before an event. This way, you have one less thing to worry about. Just remember to let them set in the fridge before serving.
You learned how to make chocolate-covered peanut clusters step by step. We covered ingredients, melting techniques, and storage tips. Remember, these treats are easy to customize with different nuts or flavors. Adjust the chocolate and oil for the right texture. Store them correctly for the best taste. Enjoy sharing these tasty snacks with friends or family. Making them ahead of time makes for simple gifts or snacks. Keep experimenting, and you’ll find your perfect recip