Looking for a fun and tasty way to enjoy a healthy treat? Chocolate Covered Banana Pops are the perfect answer! These simple frozen delights combine ripe bananas, rich dark chocolate, and your choice of toppings for a snack that’s both delicious and satisfying. In this post, I’ll guide you through the easy steps to create these yummy pops at home. Get ready to impress your family and friends with this sweet, cool treat!
Why I Love This Recipe
- Fun to Make: These chocolate-covered banana pops are not only delicious but also a fun activity to make with kids or friends!
- Healthy Twist: Using bananas as the base provides a naturally sweet and nutritious snack that satisfies your sweet tooth without the guilt.
- Customizable: With various toppings like nuts, coconut, and sprinkles, you can easily personalize each pop to suit your taste.
- Great for Parties: These pops make a playful and impressive treat for gatherings, adding a touch of whimsy to your dessert table.
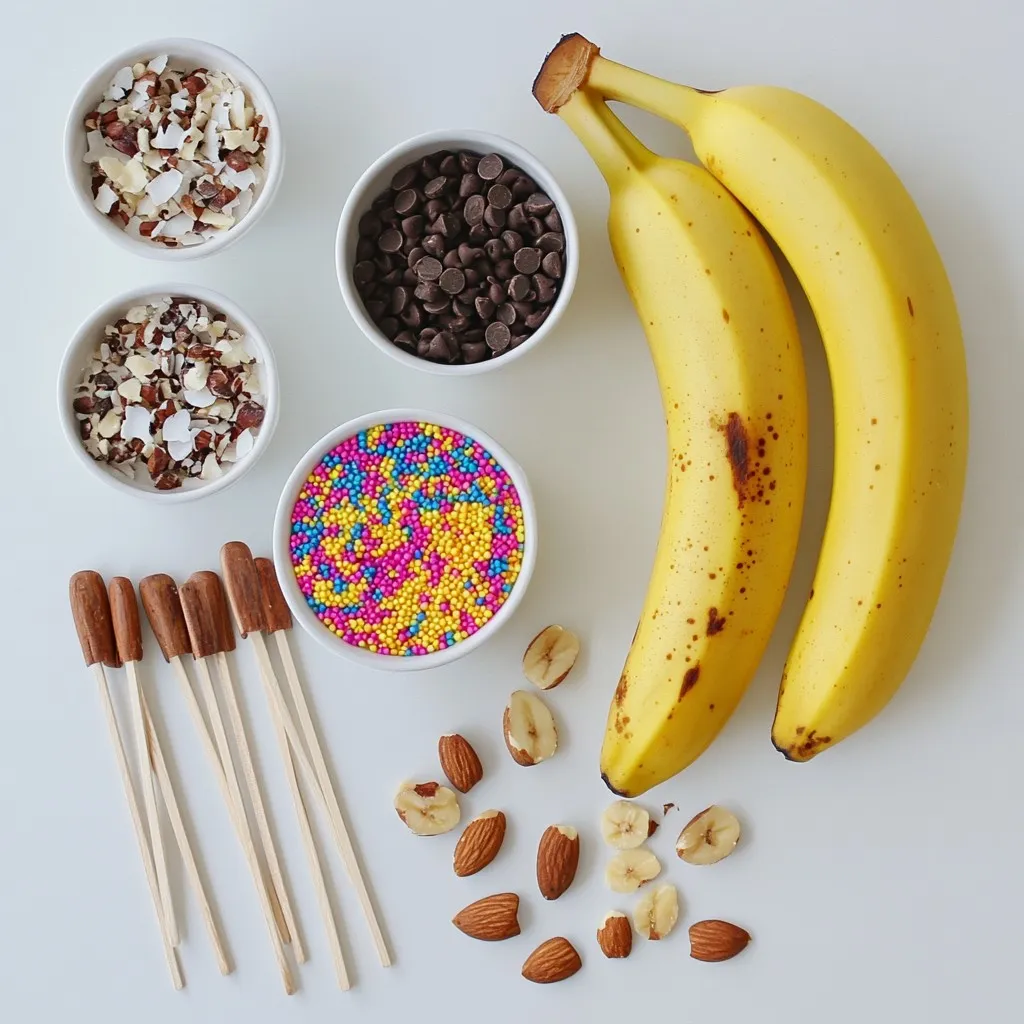
Ingredients
Ripe Bananas
You need 2 ripe bananas for this treat. Ripe bananas are sweet and soft. They hold up well after freezing. Choose bananas that are slightly soft to the touch. Avoid bananas with dark spots.
Dark Chocolate Mixture
For the chocolate coating, use 1 cup of dark chocolate chips. This gives a rich flavor. Add 1 tablespoon of coconut oil. The oil helps the chocolate melt smoothly and coat better.
Toppings Options
– Crushed Nuts: Use 1/4 cup of crushed nuts. Almonds or walnuts work well. They add a nice crunch.
– Shredded Coconut: Use 1/4 cup of shredded coconut for a tropical twist. This adds sweetness and texture.
– Colorful Sprinkles (optional): Use 1/4 cup of colorful sprinkles for fun. They make your pops eye-catching and festive.
– Wooden Popsicle Sticks: You need 4 wooden popsicle sticks. These help you hold the banana pops easily.
With these simple ingredients, you can create a tasty and fun treat. Enjoy mixing flavors and textures to make your banana pops special!
Step-by-Step Instructions
Preparing the Bananas
Start by peeling the bananas. Cut each banana in half. You will have four pieces total. Take a wooden popsicle stick and insert it into the cut end of each banana half. This makes them easy to hold. Place the banana pops on a baking sheet lined with parchment paper. This helps with cleanup later.
Melting the Chocolate
Next, grab a microwave-safe bowl. Add the dark chocolate chips and coconut oil. Heat this mix in the microwave. Do this in 30-second intervals. Stir well after each interval. Keep heating until the chocolate is smooth and melted. It should have a nice velvety look.
Dipping and Coating the Banana Pops
Now it’s time to coat the bananas. Dip each banana pop into the melted chocolate. Use a spoon if needed to help coat them evenly. Let any extra chocolate drip back into the bowl. Roll the chocolate-dipped pops in your choice of toppings. You can use crushed nuts, shredded coconut, or colorful sprinkles. This adds fun texture and flavor!
Freezing the Pops
Carefully place the coated banana pops back onto the baking sheet. Make sure they are spaced out. This prevents them from sticking together. Once all the pops are coated, put the baking sheet in the freezer. Let them chill for 1-2 hours. They are ready when the chocolate is firm and hard. Enjoy your tasty frozen treats right away!
Tips & Tricks
Best Practices for Melting Chocolate
To melt chocolate well, start with dark chocolate chips. They melt smoothly and taste great. Mix the chips with a bit of coconut oil. This helps to keep the chocolate silky. Use a microwave-safe bowl for easy melting. Heat your chocolate in 30-second bursts. Stir after each time to avoid burning. Once melted, let it cool for a minute before dipping. This improves the coating on your banana pops.
How to Achieve Even Coating
To coat your banana pops evenly, dip each one fully into the melted chocolate. Use a spoon to help cover all sides. Hold the banana pop over the bowl for a moment. Let excess chocolate drip back in. This step helps prevent thick spots. After coating, roll the banana pops in your choice of toppings quickly. This ensures they stick well while the chocolate is still wet.
Presentation Tips for Serving
Serving your banana pops can be fun! Try using a decorative platter to show them off. You can also stand them upright in a glass filled with ice or rice. This keeps them from touching each other and makes a nice display. For extra flair, add a few fresh fruits or mint leaves around the pops. This adds color and freshness to your dessert table.
Pro Tips
- Use ripe bananas: The riper the bananas, the sweeter and creamier they will be, enhancing the overall flavor of your pops.
- Melt chocolate properly: Be careful not to overheat the chocolate; stirring every 30 seconds helps maintain a smooth texture without burning.
- Experiment with toppings: Try different combinations of nuts, coconut, or sprinkles to find your favorite flavor pairings.
- Store carefully: To prevent the banana pops from sticking together, place parchment paper between layers if stacking in an airtight container.
Variations
Flavor Combinations
You can make your banana pops even yummier! Try adding peanut butter or Nutella. Just spread a layer on the banana before dipping it. This adds a creamy twist. It also gives each bite a rich flavor. You can mix and match. Try almond butter or any nut spread you love.
Alternative Toppings
Get creative with toppings! You can use crushed cookies or seeds. Think about crushed Oreos or graham crackers for a fun crunch. Seeds like pumpkin or sunflower add a nice healthy touch. These toppings make your pops look and taste amazing. The options are endless!
Healthy Substitutes
Want a healthier treat? Use dark chocolate alternatives. Dark chocolate has less sugar and more antioxidants. You can also try yogurt-based dips for a lighter option. This keeps the treat tasty but adds some nutrition. Enjoy your banana pops with less guilt!
Storage Info
Short-Term Storage
Store your chocolate covered banana pops in an airtight container. Keep them in the freezer. They will stay fresh for up to one week. If you plan to eat them soon, you can leave them out for a few minutes. This makes them easier to bite into.
Long-Term Freezing Tips
For longer storage, wrap each banana pop in plastic wrap or foil. This helps protect them from freezer burn. You can also place them in a freezer bag. Be sure to remove as much air as possible. This method keeps them tasty for up to two months.
Reheating Instructions
These pops are best enjoyed straight from the freezer. If you want to soften them a bit, let them sit at room temperature for a few minutes. Avoid using heat, as this can melt the chocolate. Enjoy your treat while it’s still cold and firm!
FAQs
How can I prevent the chocolate from cracking?
To stop the chocolate from cracking, make sure to use coconut oil. Adding one tablespoon of coconut oil to your chocolate helps it stay smooth. When you melt the chocolate, do it in short bursts. Stir well after each 30 seconds in the microwave. This keeps the chocolate warm and smooth. Also, coat the bananas quickly and place them in the freezer right away.
Can I use milk chocolate or white chocolate?
Yes, you can use milk chocolate or white chocolate. Both will taste great! Just follow the same steps as with dark chocolate. Melt them slowly in the microwave, stirring often. Each type of chocolate will give a different flavor and look. Milk chocolate is sweeter, while white chocolate is creamy and rich.
How long do chocolate-covered banana pops last?
Chocolate-covered banana pops last up to one week in the freezer. After freezing, place them in an airtight container. This keeps them fresh and tasty. If you leave them out, they will melt quickly. Enjoy them straight from the freezer for a cool treat!
What other fruits can be used for this recipe?
You can use many fruits for this recipe. Strawberries, pineapple, or apple slices work well. Just make sure the fruit is firm. Cut them into bite-sized pieces, and use the same steps for coating. Each fruit gives a unique taste and texture, making your pops fun and fresh!
In this post, we covered making delicious chocolate-covered banana pops. We discussed ripe bananas, melting dark chocolate, and fun toppings. You learned easy steps to prepare, dip, and freeze your pops. I also shared tips for perfecting your chocolate melting and coating. Remember, you can get creative with flavors and toppings. Enjoy your tasty treats and impress your friends! You now have all the tools to make this simple and fun snack at home. So grab your ingredients and start creating your tasty banana pops toda